|
Affiliate links are in this article, click here for more info
Whether you've noticed what it is or not, surely you've come across those photos of really beautifully-crafted beach art made with epoxy resin. Epoxy has seemingly taken over the modern art world, and when it's done correctly it's no wonder why! With that being said, as the beachy (and creative) person I am, when I saw Walmart DIY epoxy kits for only $30, I knew I had to try it, so I made it a "date-night" activity with my boyfriend and we went to work.
For those who are unfamiliar, epoxy resin is a type of plastic that can be molded into a variety of objects. It's liquid before being mixed with a hardener, then it's poured into a mold (usually silicone) and left to harden for about 24-hours. While industrial epoxy is noxious, poisonous and not great for home crafts, most art epoxy is deemed to be "food safe" and low-odor. Many artists even use it on serving platters, cups, and counter/tabletops. Though, as pretty as it may be, personally I still wouldn't eat off of it. But what I find most impressive about epoxy is the way it can be layered and turns out looking like there's a miniature ocean on a surface (click on photos to enlarge):
I watched enough YouTube videos to get a general idea of what would need to go into making a piece similar to those above, but my options ended up being limited with what actually came in the kit.
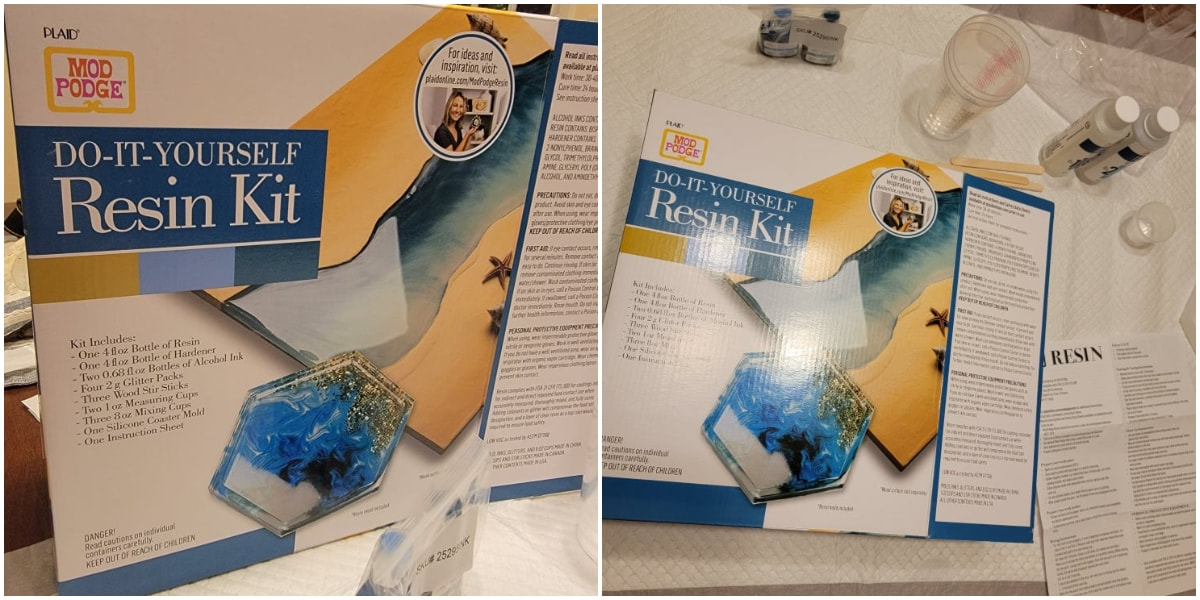
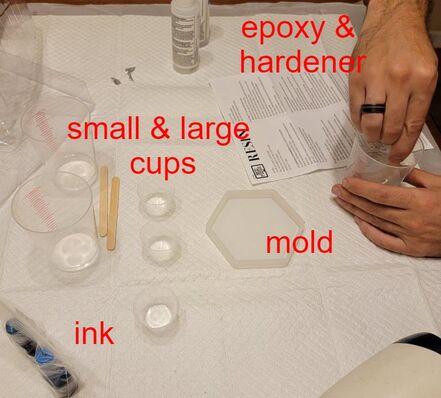
Epoxy is a relatively expensive material, so before you scoff at what $30 will buy you, just know that it was considerably reasonable for a first-timer who doesn't want to invest in a wholesale amount of product. Two bottles of the same amount of epoxy from Walmart was $15 alone, and if all of the items in the pack were purchased separately it would have been more expensive than what was in the kit. Though, don't be like me and assume the photos on the package show everything that's going to come with the pack. From first glance at the cover photo (and size of the box) it seem as though there is going to be a wooden board included, however only one silicon cup holder tray was in the box. The trays could be bought on site for an additional $5, but we decided they looked a little cheap and will just try the mold to start. Here's everything that came with the kit (pictured below):
And what didn't:
I highly recommend using a face mask and rubber gloves to handle the epoxy even though it's "food safe and low-odor." There's actually a warning on the box that says contact with the materials can cause allergic reactions in some people and to work only in a well-ventilated area or with a respirator.
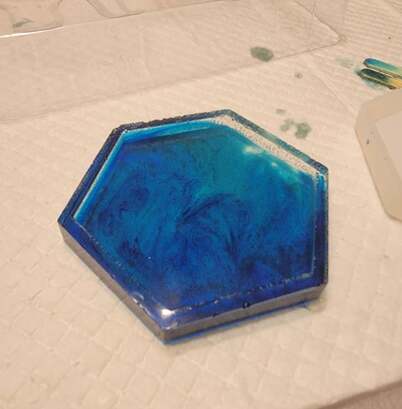
A tablecloth was a necessity, but since I didn't have one that I wanted to sacrifice for the sake of art I used a puppy pee pad to protect my wooden surfaces. I wasn't sure if the epoxy would leak through, but to my delight it did not! Anyways, after getting myself and the surface properly suited, we read the directions that came with the kit which were quite a bit different from what we saw online for the beach designs. Most of the tutorials we watched mentioned layering the mold over a period of several days to hours, but the instruction manual says to pour it all together at once. And we were impatient, so we just did what the instructions said. We mixed the clear epoxy and hardener, stirred for 3 minutes and let it sit for another 3 to let it settle. We then took some of the clear mixture and poured it into two smaller cups to add color to, then we slowly added all of the liquid epoxy together in the mold. Overall, we used about half of the epoxy and hardener to fill one silicone mold, equally measuring out some dye in the smaller cups and using a hair dryer (as we didn't have a heat gun) to pop as many inevitable bubbles as possible. What I learned is that... It's definitely a necessity to wait before layering different colors on top of each other or else you end up with:
Which is a far cry from what I hoped for.
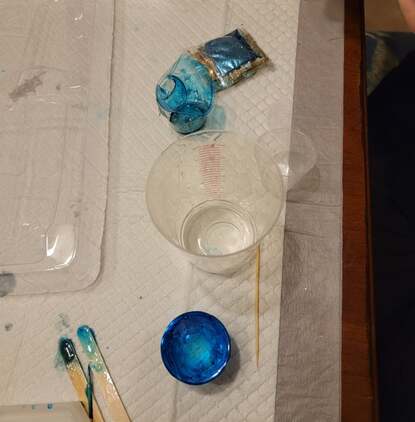
The epoxy took about 24 hours to dry to the point I could remove it from the mold, and as you can see from the photo, the edges are rigid from the unpopped bubbles and instead of having layers of colors, it looks like one solid color with maybe a tinge of color variation. It's not ugly, but it's certainly not what I wanted. But that's okay and exactly what I expected would happen as a first time project! What's great is that I still have half a bottle of the epoxy left so I'm going to take a different approach for next time by purchasing white dye, waiting a few hours between the layers, and investing in a heat gun because clearly my hair dryer wasn't quite good enough. Thankfully, however, the cleanup was incredibly easy and the epoxy can just be peeled out of the measuring cups once hardened, so it negates the necessity of always buying more. The same can't be said for the mixing sticks as once they hardened they became stuck to the pad.
Overall, I wouldn't say it was a total success for what I wanted to do with it, but if we are just going by the instruction manual, it came out almost perfectly. The kit left a few things to be desired, but not much.
At very least, it was a fun and experimental activity for a cheap date night (since we love those!) and it was a learning experience. I feel like I can appreciate epoxy crafts so much more now and I'm looking forward to picking up this new hobby! If you want to purchase your own kit, I highly recommend this one on Amazon that includes more colors and items for just about the same price. Happy crafting!
Do you have a business or item you'd like to promote on The Sunburnt Blogger? Email us at [email protected]!
0 Comments
Your comment will be posted after it is approved.
Leave a Reply. |
CATEGORIES |
|
|
Vertical Divider
|
Can't get enough?Uncover more of Florida through our channels below!
|
© COPYRIGHT 2015. ALL RIGHTS RESERVED.


 RSS Feed